In spite of what Punxsutawney Phil says, spring really IS on its way. And at the risk of being even more controversial, it is TRUE that the days really are getting longer. That means until June 21, there’s going to be more and more daylight hours available for you to get some of those weekend energy efficiency projects done. But where to start? What are the best energy efficiency projects for you home that actually reduce your energy usage and save you money?
No worries! We’ve already sorted those out for you. In Part One, we'll cover Air Sealing, Insulation, and Windows.
Home Energy Efficiency Projects for the Weekend
Off the bat, the two big home energy improvement projects are air sealing and insulating. But to do them right, you need to do them in the right order; air seal first, insulate second. Why? Generally speaking, you want to air seal your home to keep out the moist outside air. Whether you live in a mostly cold climate or hot and humid, trapping moisture from outside air inside insulation usually leads to mold and wood rot.
How to Air Seal Your Home
Air sealing your home not only reduces the amount of outside air getting into your home through drafts but also the amount of conditioned air (heated or cooled) that gets out. To do it right, you’ll need to seal or fill every gap in your home’s walls and ceilings. Where to seal:- Any place where pipes and wiring go through walls or ceilings, such as from the garage or attic.
- Where the rim joist meets the mudsill along the foundation.
- Any gaps you find around window and door jambs. Check for drafts by loosely taping a piece of tissue paper to a clothes hanger and trying to move it slowly around door or window edges to see if a breeze catches it.
- Use expanding foam to fill up any gaps such as those around pipes and wiring. In the attic, seal around the soil stack and cover over dropped soffits. Be sure to seal around fireplace flue using metal flashing.
- Caulk around electrical junction boxes or places with smaller gaps. Use light fixture insulation boxes for recessed “can” lights.
You’ll also want to check weather-stripping on windows and doors to be sure they close snugly. Make sure to get the right weather stripping for the job.

How to Add Insulation to Your Attic
Most attics are designed to be part-outside and part-inside the home. They allow excess moisture to leave your home, preventing mold and rot, while shielding all your attic insulation from the elements. Attic insulation also works like a thermal shield. The more insulation that’s in your attic, the better shielded your living area is from stifling hot summer temperatures or from wintertime cold. Most homes have less than adequate amounts of attic insulation — somewhere around R-20. However, the DOE recommends a minimum of R-30. That’s around 12” thick for both blown cellulose and fiberglass batts.
Decide what type of insulation you’ll use and calculate the amount. In most cases, you can put more right on top of a previous layer of insulation. however, different types of insulation have different properties and must be installed using different methods. For example, blown cellulose is cheap but it will require the use of a blower spray around the attic and then a garden rake to spread it around evenly. Fiberglass batts go in very quickly but each layer must be place perpendicular to the one below it. Plus, DO NOT USE kraft-face insulation.
How to prepare:
- Make sure air sealing is complete in the attic. (NOTE—Retro-air sealing is messy, laborious, and expensive because you have to remove ALL the insulation.) Install soffit baffles to preserve channels for air to flow up from eaves soffits into the attic.
- Make insulation dams for each rafter space to keep the insulation out of the soffit vents. These barriers can be made with wood, cardboard or rigid foam.
- Wear work gloves, safety glasses, N95 disposable respirator masks (yes, you DO WANT to wear one of these), and knee pads/knee guards.
- Carry a small but very bright LED flash light, a whisk broom, and tape measure.
- Carry a scrap piece of 2 foot long, 3/4” thick board or plywood. This is just handy to put it across the joists to kneel on instead of scrunching around on the joists.
- Start at the end of the attic that is opposite to your attic entrance. Insulation loses it’s R-value effectiveness if it is compressed by being walked on.
Insulating your attic is hot, dirty work, so be sure to take breaks and stay hydrated.

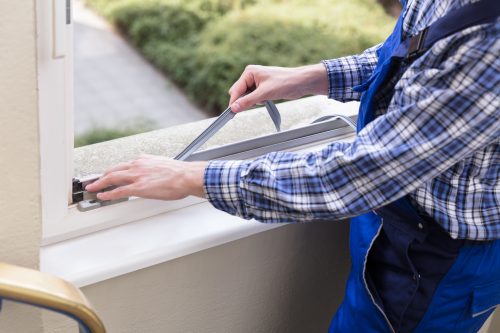
How to Inspect Your Windows
Condensation problems on windows can be caused by lots of things, including leaks and drafts coming from around the window frame or from the window itself. It can also point to bigger problems within the window structure, including rot and problems with thermal bridging. Thermal bridging happens when metal components in a window, such as the frame or opening hardware, conduct cold/heat from the outside inside. In cold weather, condensation can form on the cold metal. If it’s cold enough, it can freeze. Over time, you may have to replace the entire window with a new one. Look for:- Excessive water staining (white wood) or heavy condensation. Ice is a giveaway for growing problem.
- Look for soft spongy wood along the window frame. This means the wood is rotten.
- During winter weather, wet the back of your hand and feel along the window edges for any cold drafts.
- On newer windows, check the condition of the weather stripping.
If you have old sash windows, check for loose or missing glazing. Cleaning off the loose caulk and resealing it with silicon caulk is a good temporary fix. These should be re-glazed properly when the weather warms up.
Stay tuned for Top Weekend Energy Efficiency Projects, Part Two!
See your hard work pay off by tracking your energy usage. Sign up for an electricity plan with Direct Energy and you'll get the tools you need to track your usage and stay energy efficient. You could even get free electricity every weekend in select states! Sign up for Direct Energy and get a great deal on electricity today.